Using the Revit Import Utility
This portion of our software is currently in beta: Your feedback is extremely important to improve this utility. Please report bugs and give feedback to support@drawtech.com
Requirements
- DrawTech v7.30 or higher.
- AutoCAD MEP 2013 or higher must be installed on your machine.
- Revit MEP 2014 or higher. (Vanilla installations of Revit include MEP)
Installation -
To use the Revit Import Utility, you will need to load the add-in into the version of Revit you’re currently using.
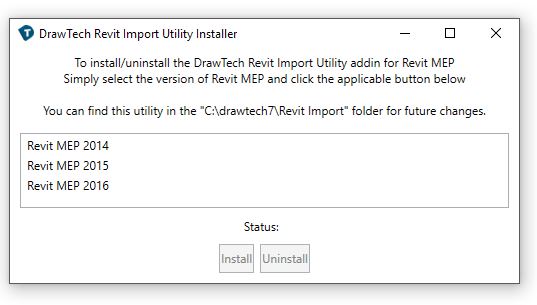
- Navigate to the C:\drawtech7\Revit Import folder that’s included with DrawTech installation and open the RevitImportUtilityInstaller.exe file.
- In the Window that appears, select the version of Revit that you wish to install the add-in to. Note, only versions that you have installed on your machine will show up.
- Click the “Install” button.
Using the Utility
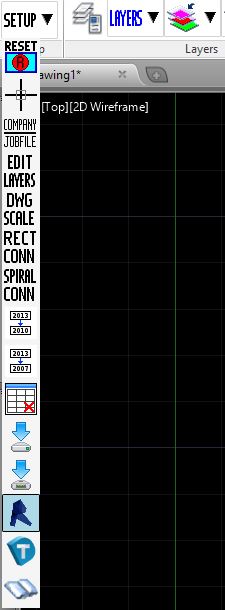
In DrawTech, you will find a new routine under the Setup dropdown on your ribbon called DtRevitExport, this routine will export the contents of your drawing into a file that can be imported into the Revit Import Utility.
- Run the DtRevitExport routine found under Startup, or enter the command into AutoCAD, DtRevitExport This will create a “Revit Import” folder in your drawing location. You’ll find the import files in this folder.
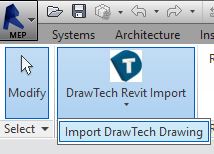
- Open Revit and open a project (RVT) that you want to import your DrawTech fittings into. If you are looking to create a file from scratch, you can use one of the Project Templates available under C:\drawtech7\Revit Import\Project Templates. Once the project is open, navigate to the ‘Add-ons’ tab.
- Click the “DrawTech Revit Import” button and select “Import DrawTech Drawing” from the dropdown.
- Navigate to the “.dri” for your drawing and then select it.. This will be located on your machine under X:\<DRAWING FILE LOCATION>\Revit Import\<DRAWING FILE NAME>\.
A brief introduction into our utility within Revit.
The DrawTech Revit Import utility will take the information from your DrawTech objects in DrawTech and use it to create family instances of equivocal objects in Revit MEP using families built in Revit. To help you understand and utilize this utility, there are a couple of things you should be aware of.
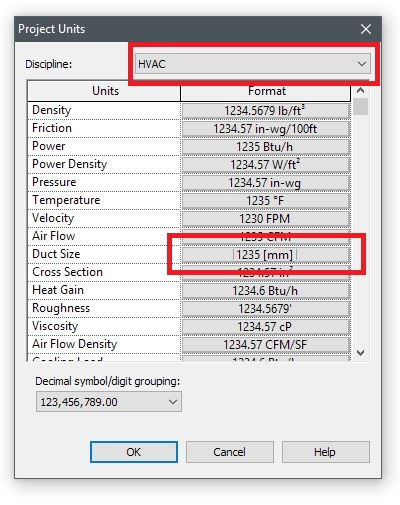
Project Units – Revit MEP project files, much like AutoCAD DWGs, will be set to Measurement Unit standards. Before importing our fitting families into Revit, you’ll want to make sure your project file has it’s units correctly set-up.
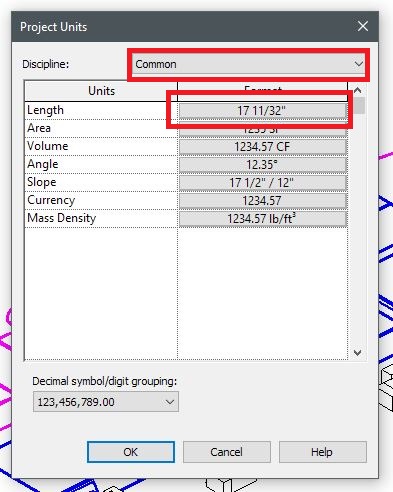
You can find the units panel under the “Manage” tab on the Revit Ribbon and clicking “Project Units.” This will open a window containing the unit configuration for your current project.
Our fittings, as of now, are primarily concerned with two Project Scale items being set correctly.
- Duct Size under the HVAC disicipline. Make sure this is set to either Fractional Inches or Milimeters depending on your DWG INSUNITS variable.
- Length under the Common disicipline. Make sure this is set to either Fractional Inches or Milimeters depending on your DWG INSUNITS variable.
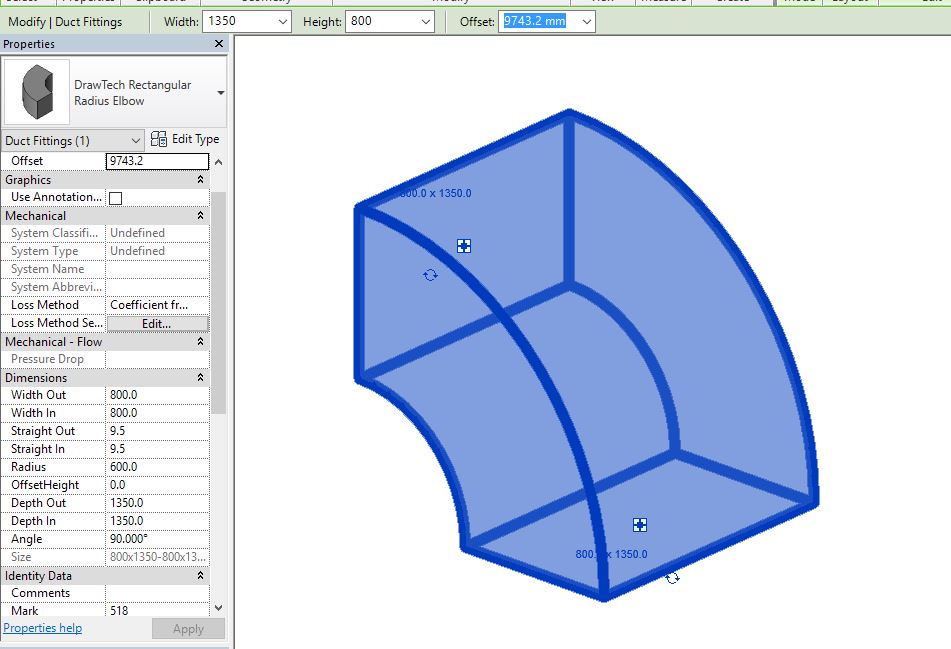
Modifying our families – As with many other family types within Revit, modifications to our families can be done through the “Properties” palette under the “Dimensions” section. Shown below.

